Video can undoubtedly take your presentations to the next level…but only if done correctly and seamlessly. Otherwise, you can really disrupt the flow of your narrative to pause, find your file, pause for potential pre-roll ads, etc., leaving your audience disconnected and worse…disinterested.
And listen, I get it. No matter how big or small your audience is, presenting is nerve-wracking. Add on top of that, a maneuver from slides to video back to slides – it can be stressful. Here are some helpful tips and six easy steps to embed video into your next set of slides.

Before we jump into the steps to embed a video into your slides, let me lay out all of your options when it comes to video: essentially, you can either embed your video or link to it and there are advantages & disadvantages to both.
Let’s say you link to your video:
The pros here are that you can link to anywhere, so your video options are current and relevant. If you want to incorporate breaking news or a recent social example, linking definitely allows you to pivot easily. By linking to a video – whether it’s to somewhere on the web or to a file on your own computer – your presentation’s file size is kept MUCH lower than if you were to embed that video file.
What are the disadvantages? Well, if you’re linking to a file on your computer, you must make sure that video file is always copied alongside the presentation should you want to view it (or present it!) on a different computer.
For example: you build & edit your presentation on your computer. It looks killer. You get to the client’s office/speaking engagement/classroom and are asked to present using their computer via a USB drive. DO NOT FORGET TO PUT THE VIDEO FILE ON THE USB along with the presentation. Otherwise, you’ll click play, PowerPoint will go to find the file using the link you directed it to & will come up with nothing. And then you’ll start sweating and making dad jokes about technology and it won’t end well.
Helpful tip: Create a folder on your computer, and here save your presentation as well as any other linked files – video, sound files, links to websites, etc. – in one place. That way, when you go to copy your content over to a USB or other device, you can just copy the whole folder.
One other disadvantage of linking to videos on the web is that you HAVE TO HAVE AN INTERNET CONNECTION to view the video file.
Once more, louder for the people in the back.
IF YOU AREN’T GUARANTEED A WORKING INTERNET CONNECTION, DO NOT LINK TO VIDEO CONTENT ON THE WEB.
You have to be able to not only reach the video content using the internet, but also stream it, so if you’re working with a crappy hotspot or an internet connection that takes you back to the AOL dial-up days, you’re better to put the video file on your own computer or embed it.
How about embedding video:
So the pro here is that you don’t have to worry about connections or extra files – when you embed a video into your presentation, it becomes part of that file – just like the pictures you use. This means that you can email or open one file and all of your slides – including your video – will be there.
The catch, however, is that embedding your videos will drastically increase your file size and, depending on your computer’s model & speed, could cause your presentation to lag a little as your hard drive works on overdrive to play the large video file.
Overall, if you can embed your file that’s what I would recommend…it’s the safer option because you avoid internet issues, toggling from slides to a browser tab, etc. If file size is an issue, link it, but otherwise I’d embed it.
How Do you Embed Video?
Step One: Pick a Platform to House your Video Assets
Vimeo & Youtube are your two best options here. They both allow you to grab a URL code to embed in your slides if you’re pulling a video clip that you don’t own and are very user-friendly. Be aware, Youtube is particularly copyright conscious so if you choose this platform to store your content make sure you’re not using music or images you don’t own. Vimeo also offers an ad-free option (with a small fee of course). Both have their individual merits, but you really can’t go wrong with either.
Step Two: Upload Your Content [assuming you want to embed your own video file] – you will need to create an account in order to do so.
Step 3: Copy the Video Link URL from the site:
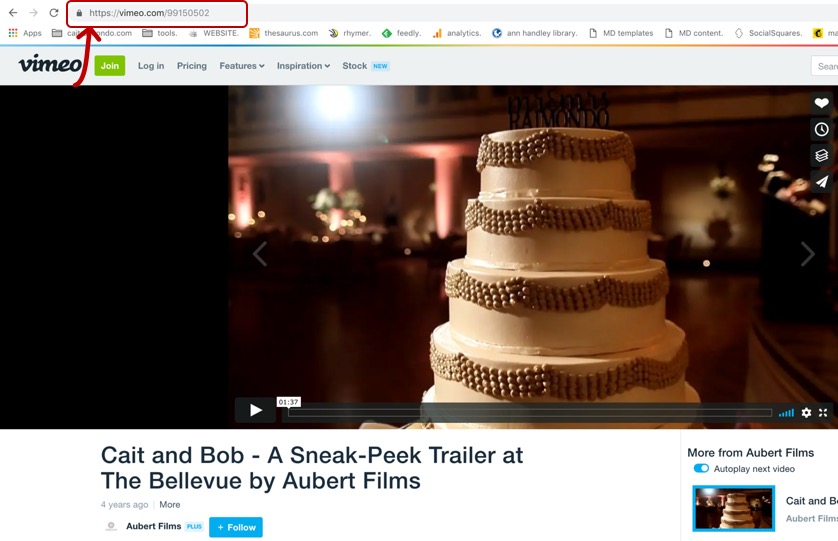
Step 4: Open PowerPoint & navigate to the slide where you would like the file to live.
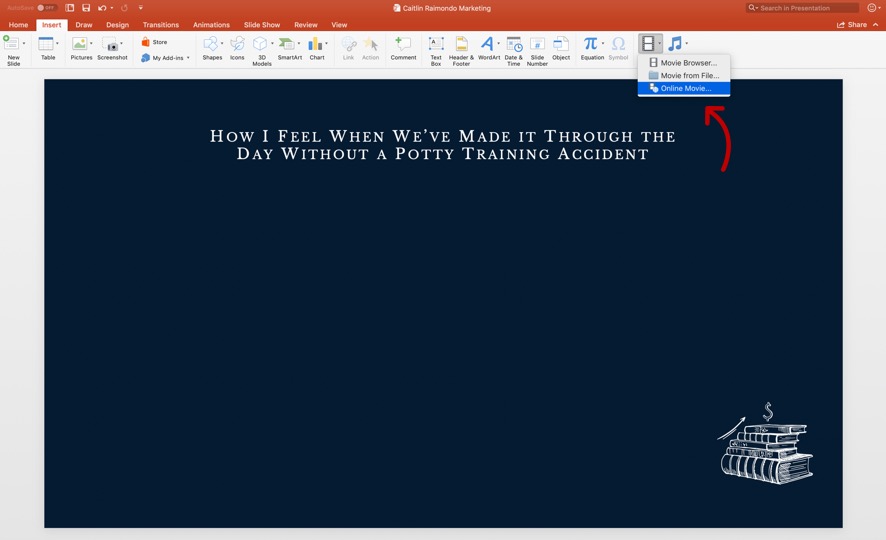
Step 5: Find the Insert menu at the top of the screen, and toggle over to Video
Step 6: Select Online Movie, which will prompt you to enter the copied URL into the dialogue box. Click Insert.
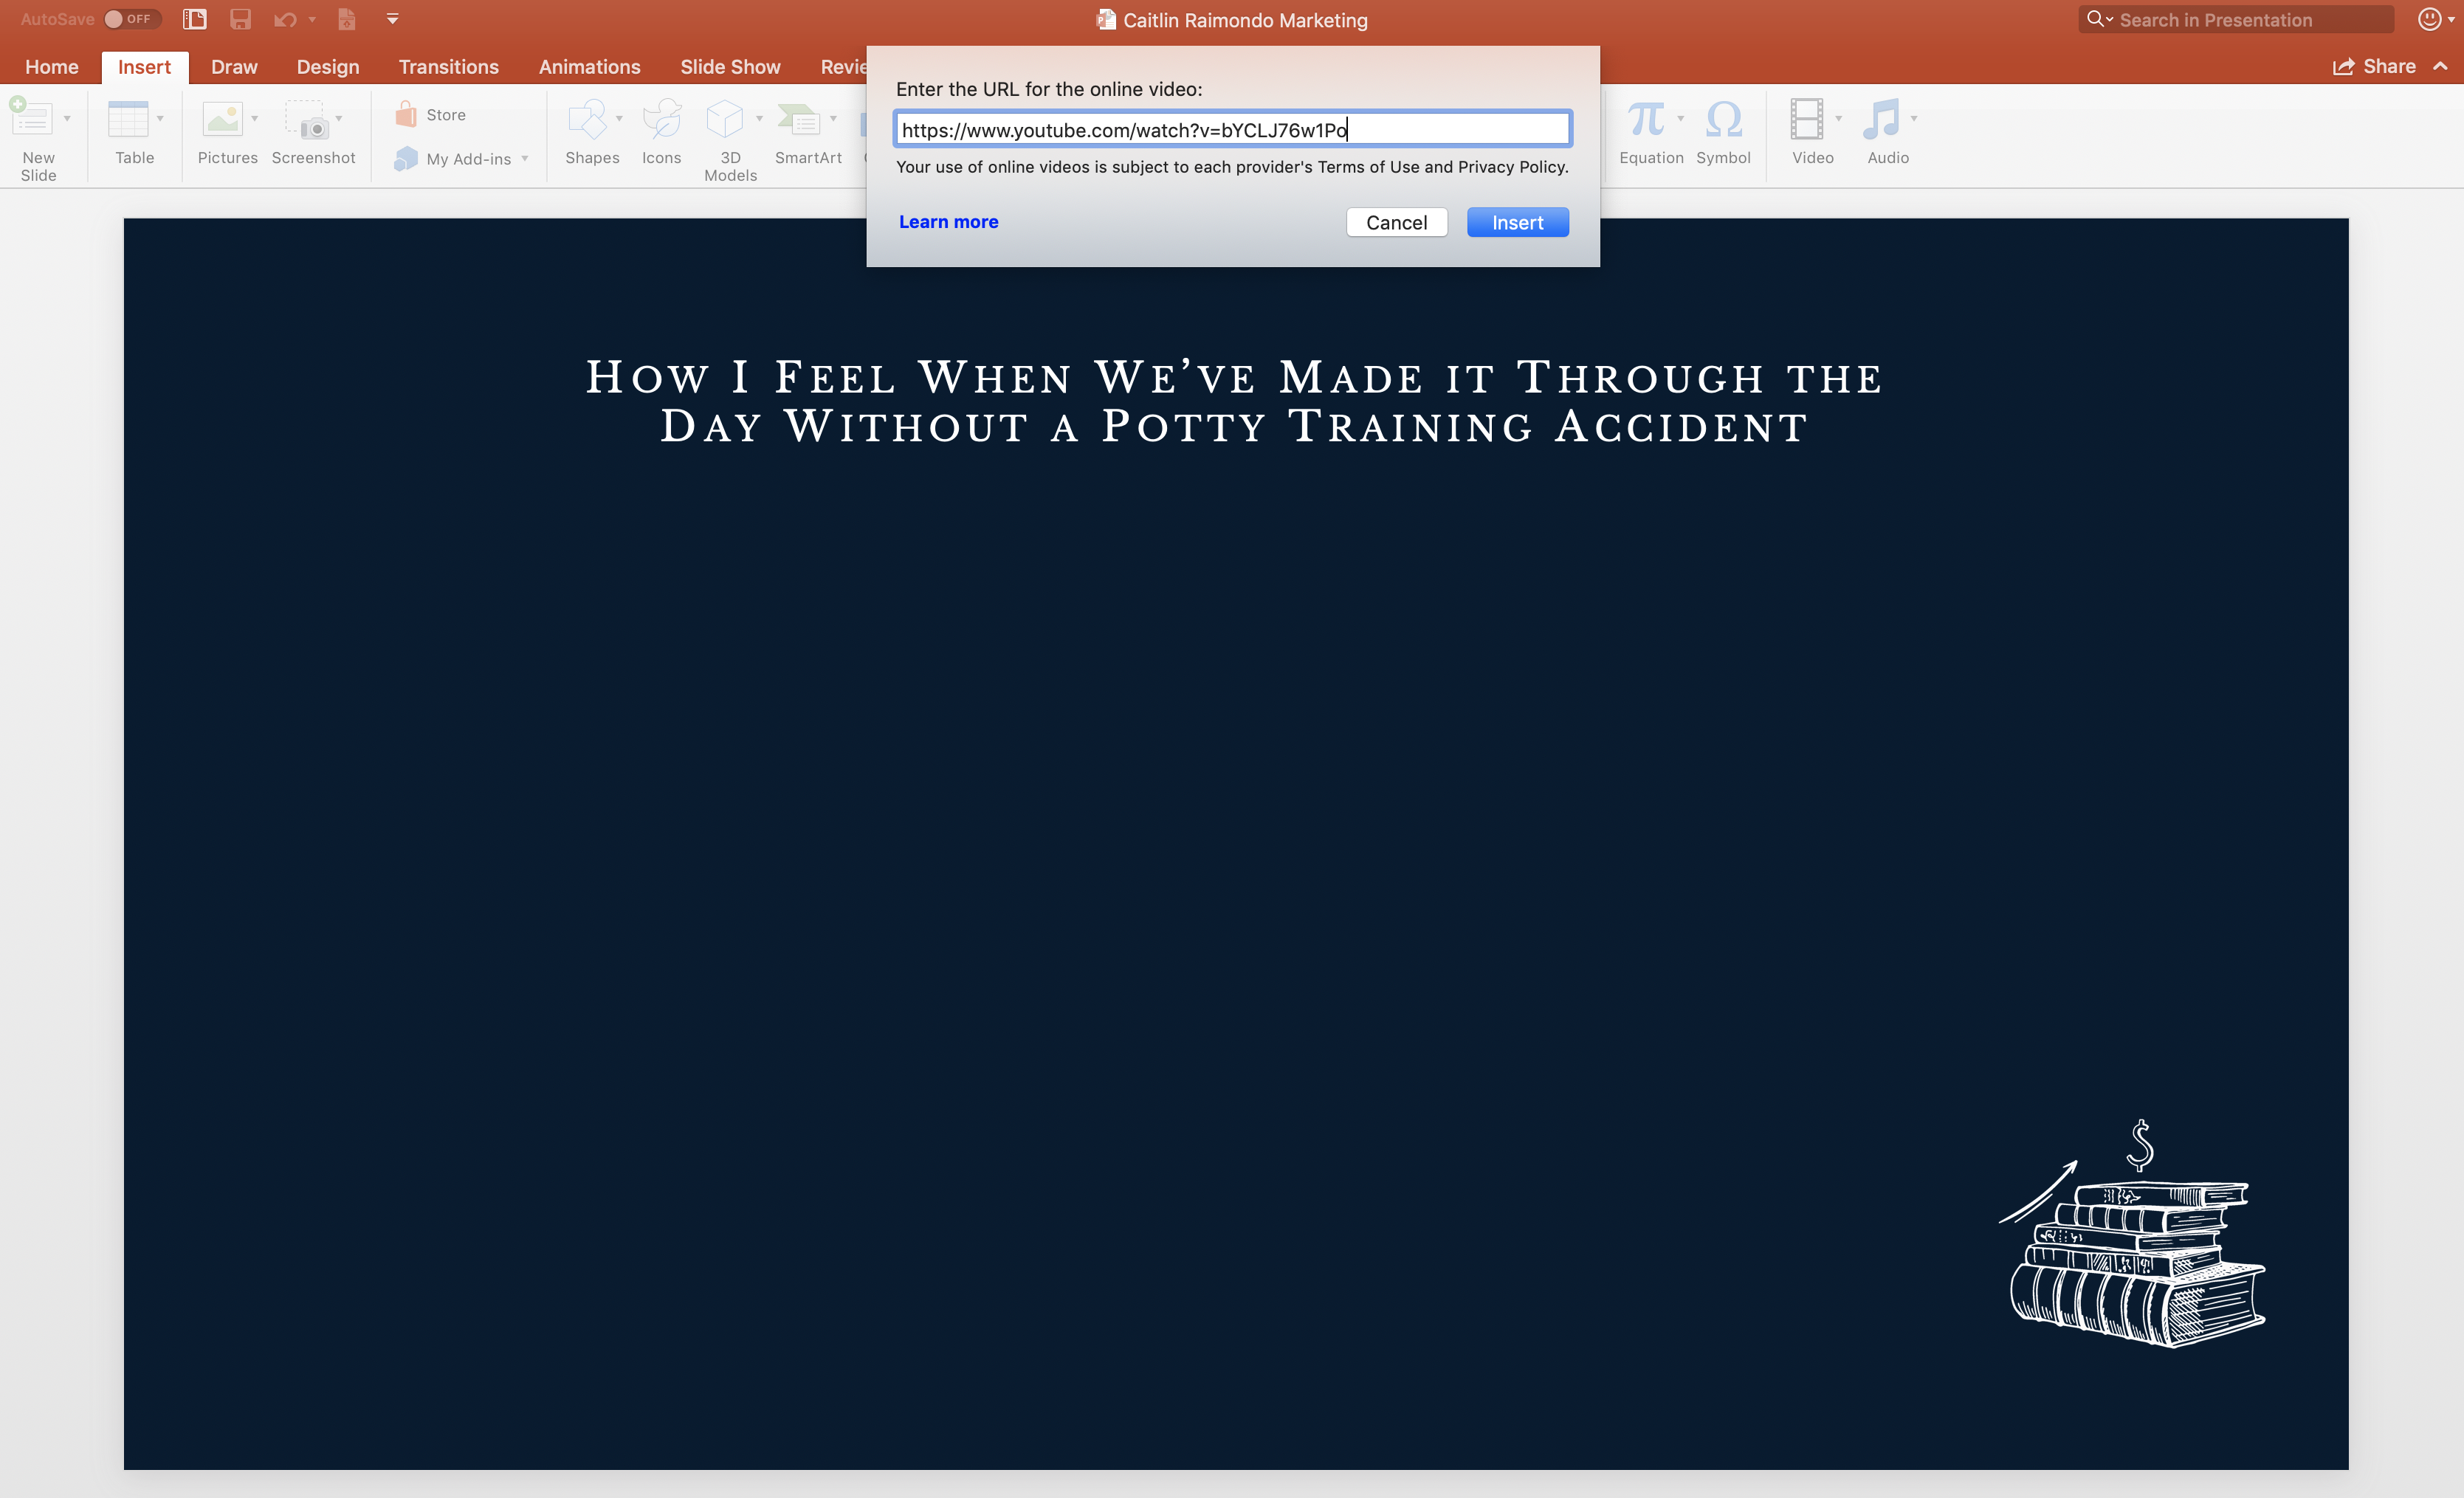

From here you can resize as needed & play around with the visual aesthetic of the video using the tools found within the video format tab.
One tip: Go into the Playback tab (which will appear at the top when you have the video selected) and find the option to select how the video starts. It is defaulted to play the video in click sequence, which means you, as the presenter, will click to bring up the slide and then click again to begin the video. Your other options are to have the video start playing automatically as soon as you click to the slide it’s on or to only play once you click on the video itself. That last option is a little clunky – the only time I would recommend it is if there’s a chance you’ll have to skip the video entirely…say, if you’re over time…and don’t want to have to click three times [once to bring the slide up, once to start the clip & once to move on to the next slide] to move past it.
Hope this helps to demystify the use of video in your presentations. Don’t be afraid of video – it can really help to keep your presentation fun and engaging!
comments +